The essential how-to guide for Microsoft Teams
Do you use Microsoft Teams in your business? This article can act as your essential guide to Microsoft Teams. Learn all the key features and functionality to get more out of your Teams platform. We’ll frequently update the guide with new features and tips, so keep it saved somewhere handy so you can always stay up-to-date.
Why Use Microsoft Teams?
Microsoft Teams is a secure collaboration platform built on Microsoft 365. You can use Teams to communicate with colleagues and clients, share files, documents, and content, and work together on projects in real time. This can be done via chat, calls, video meetings, file storage, and much more. It can be accessed via the web, desktop, and mobile apps on all your core mobile devices.
This article is your essential guide to Microsoft Teams, complete with step-by-step instructions to get first-time users up and running with Teams.
How do I start using Microsoft Teams?
In Microsoft Teams, there are three different ways to launch the application. You can either access it through your web-browser, desktop or mobile apps (iOS and Android) on devices including your laptop, tablet, or smartphone. You can use Teams for personal and business use. These are the minimum requirements to use Microsoft Teams. For the best experience, use the latest version of Android and iOS.
Regardless of whether you use the desktop, web or mobile Teams app, the Teams interface looks very much the same across the board, so the application on all devices is user-friendly. Continue this essential guide to Microsoft Teams to learn more.
How to Access Teams?
If you have Teams installed on your device, you can open Microsoft Teams using the Start button and selecting the application from the menu. This will usually take you directly into Teams without having to sign in (as long as you haven’t previously signed out).
You can also access the Teams application via the website teams.microsoft.com
Alternatively, if you have an Office 365 account, you can sign in via the web from there.
You will be asked for your Username/Email Address and Password. Click Sign In to access the Microsoft Teams Window.
Tour the Microsoft Teams Desktop Application
Note: The main screen within Microsoft Teams will differ depending on the option chosen on the Navigation Bar.
- Activity: This shows the latest activity related to your account including mentions, replies, reactions, teams you’ve been added to, and general notifications.
- Chat: You can view conversations with individuals or small groups outside of your teams. Chat allows instant messaging, audio/video calling and file sharing.
- Teams: This option shows all the teams that you have created or been invited to.
- Calendar: This will display the calendar for the account you are logged into Teams with. If you use Microsoft Outlook on the same Microsoft 365 account, the calendar entries will sync with the calendar here also.
- Calls: This will allow you to view and add contacts, call a contact and view call history.
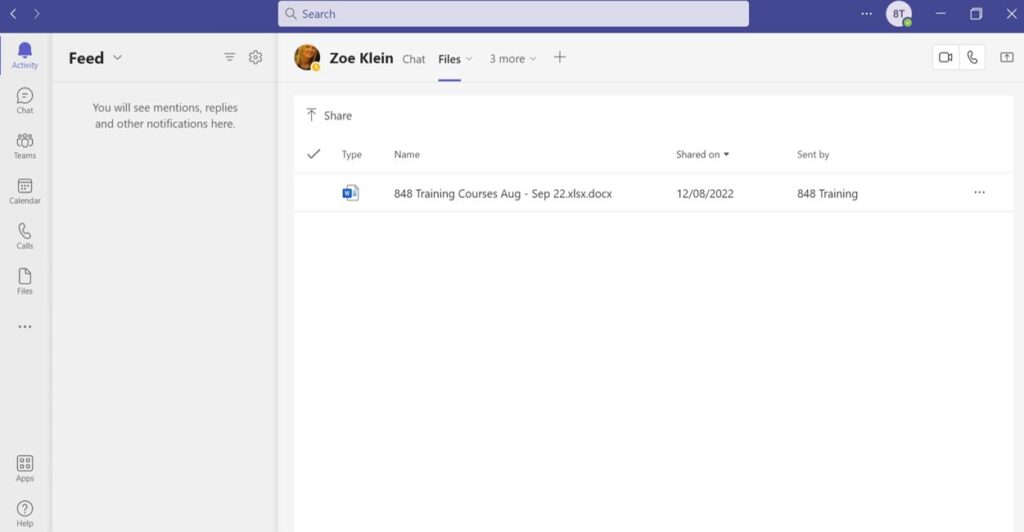
- Files: You will find all the files you work with from Teams, SharePoint and OneDrive. Files can also be added from other storage locations.
- More added apps: The three dots will allow you to add and pin additional apps to the left-hand menu e.g. Note, Word, Excel.
- Apps: You can browse and add additional apps to Teams e.g. Forms, YouTube, Power Apps etc…
- Help: Access Microsoft help, support, and training materials without leaving Teams.
- Filter and Settings: From here, you can filter your Teams Activity and access the Settings dialogue box.
- Search: Quickly Search chat messages, user directory and files by keyword.
- Ellipses: From here you can access Settings, cast your Teams screen to another device and check for updates.
- User Profile: Change your user status, set a status message, manage your account, and sign out.
- Post reply: Option to reply to an existing post.
- New Conversation: Start a new conversation thread within a channel.
Teams Chats
One of the most common features of Microsoft Teams is its use for private instant messaging, audio calls and video meetings. As with most Microsoft applications, there are many ways to initiate these. In this section, we’ll look at the easiest and most common methods.
The Teams Chat feature allows private one-to-one or small group conversations to take place between users, not just members of a team. Conversations organised within Chat are only visible to those within the private chat group, which can be up to 300 users. Teams chats are ideal for quick conversations or messages which are either private or don’t necessarily need to be posted to a wider group. Continue this guide to Microsoft Teams to learn how to create and hide chats.
Create a New Chat
- Click on the Chat button situated on the navigation bar on the left of the screen.
- Within the chat history, you may see the individual or group you wish to chat with listed. Select this option to continue your chat. If you haven’t got any chat history with someone, click on the New Chat button to the left of the search box on the top bar.
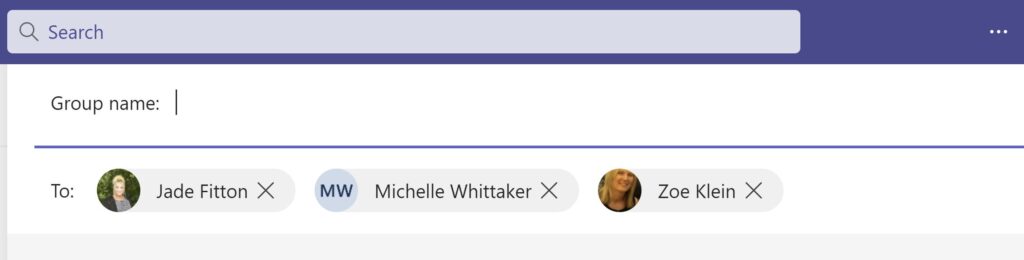
- When the Chat section opens, enter the name of the user or users you wish to chat with into the To: box. When the user is found, click on their name to add them to the chat.
- When you have inserted all the users, click on the drop-down arrow on the right-hand side of the user list box.
- Give your group chat a name (optional).
- Press the return key to apply the name.

Applying a name to group chats makes it easier to quickly identify them within the chat list.
Start typing your message in the text entry box at the bottom of the chat area and press send.

As users within the chat begin to respond, their replies will appear below your original message. You will also see a red notification on the Chat button and the chat will appear as unread if a new reply has been added that you’ve not yet viewed.
How to Add Users to an Existing Chat
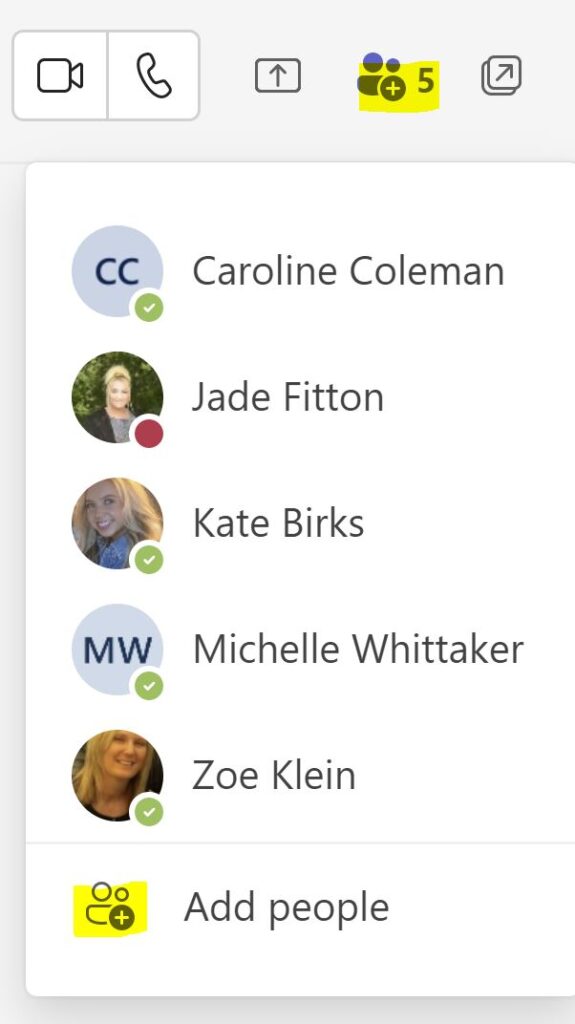
Other users can be added to an existing Teams chat by any user who is already part of the group. To add people to an existing chat: Open the chat group you wish to invite the user(s) to. Next, click on the View and Add Participants button situated in the top right of the screen and from the list choose Add people.
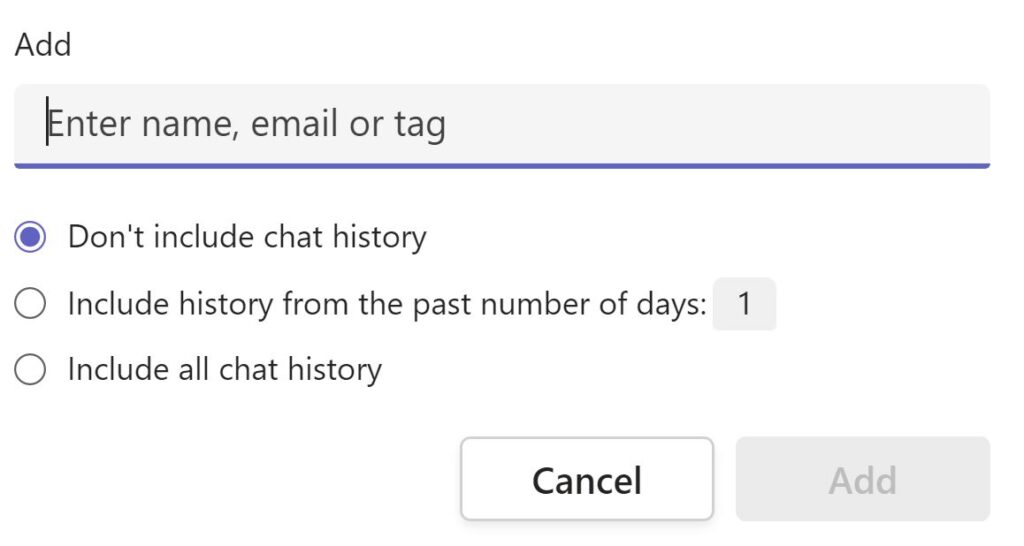
Once the Add box appears, search for the user and choose the chat history you want them to be able to view when they join. Click the Add button to add them to the chat.
A notification will appear as the latest message in the chat to confirm the user has been added.
How to Hide and Leave a Teams Chat
Over time you will find that your chat list will start to increase, and you may wish to hide or even leave a specific chat completely.
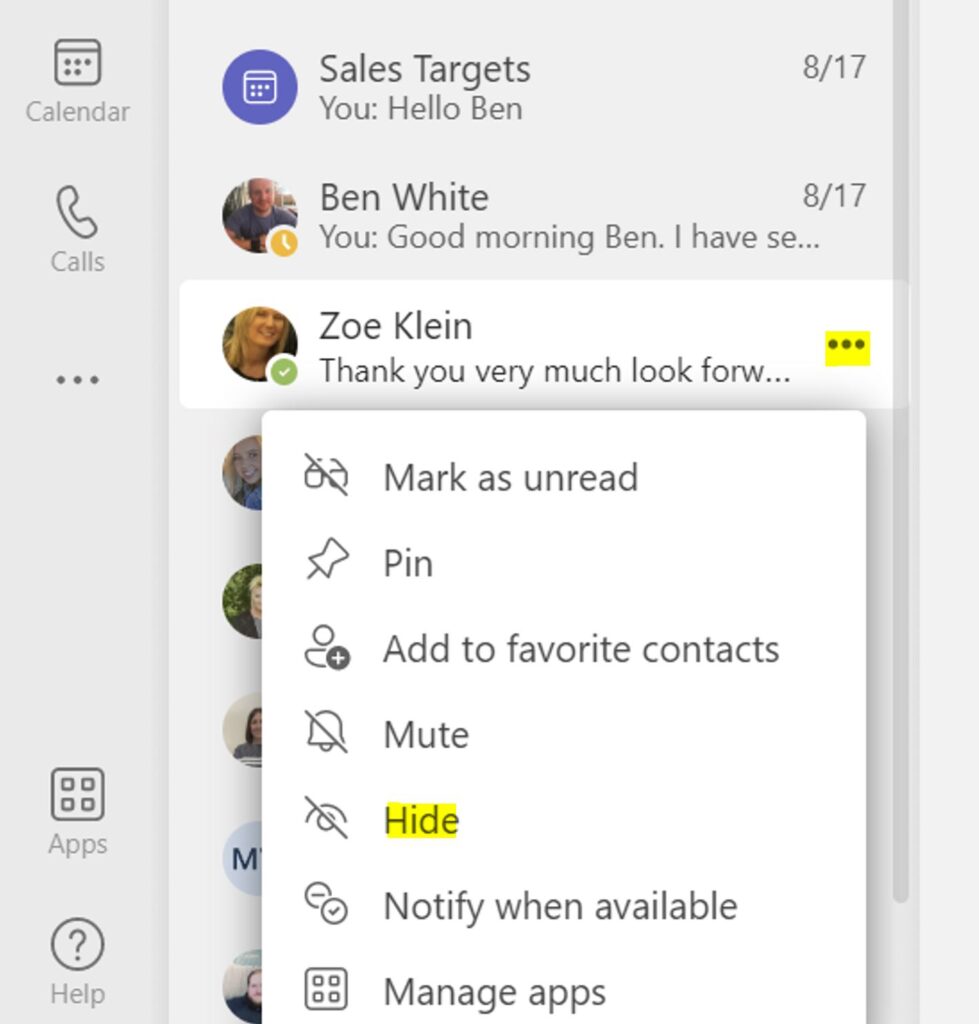
Hide a Chat:
- Select Chat in the Navigation Bar
- Click the three dots (…) to access more options to the right of the users’ name or group chat
- Select Hide from the menu
Unhide a Chat:
- If you wish to unhide a chat, type the name of the person or group in the search box at the top of Teams.
- Click on the person or group when it appears in the list.
- Click the option Show hidden chat history.
- When the chat reappears in the chat list, choose more options once again then Unhide to restore it.
Leaving a Chat:
If you would like to leave the chat, click on the More Options button for the group chat you wish to leave. Select Leave from the menu. The Leave the chat dialog box will appear, click Leave.
You will find that even though you have left the chat and you are no longer allowed to post within it, it will still appear in the chat list. If you don’t want this chat to be visible, click More Options and Hide.
Teams Meetings
A very valuable feature within Teams is online meetings. Meetings can be impromptu or scheduled in advance, allowing one or more team members to meet via audio or video. Users can also share their desktop and applications with participants in the meeting. If you are looking to participate in meetings using Teams, you’ll require a microphone and a webcam. However, you can still join, view and listen to a meeting even if you don’t have a microphone or webcam. For users using a mobile device, the built-in microphone and camera can be used.
How to Start a Video Call From Your Chat
You can start a one-to-one or group video call directly from a chat. These calls differ slightly from a standard team meeting, but the controls are quite similar.
- Open the chat from the Navigation Bar and select the chat you wish to start the video call within by clicking on it.
- Click on the video or audio call buttons in the top right corner to launch a call with the chat member(s).
You will now see the ‘Calling’ and ‘Connected’ screens for a video or audio call.
Receiving a Chat Call
When a user within your chat starts an audio or video call with you, then you will be notified of the call via a dialog box at the bottom of the screen. You then have three options:
- Accept with video: Accept the call and share your camera with participants.
- Accept with audio: Accept the call but only share your audio.
- Decline call: The caller will be given the option to leave a voicemail if you decline the call. If the caller leaves a voicemail it will appear within your Activity feed.
How to Start an On-Demand Meeting
On-demand meetings can be created from any channel within any of the teams you are a member of. Other members can be invited to take part after the meeting has begun, or they can join from the channel the meeting was created within. Invited users don’t need to be members of the team. Below is a step by step guide to start your on-demand meeting.
1. Click on Teams within the Navigation Bar.
2. Open the team and the specific channel that you wish to create the meeting within.
3. Click on the Meet now button underneath Meet in the top right of your screen.
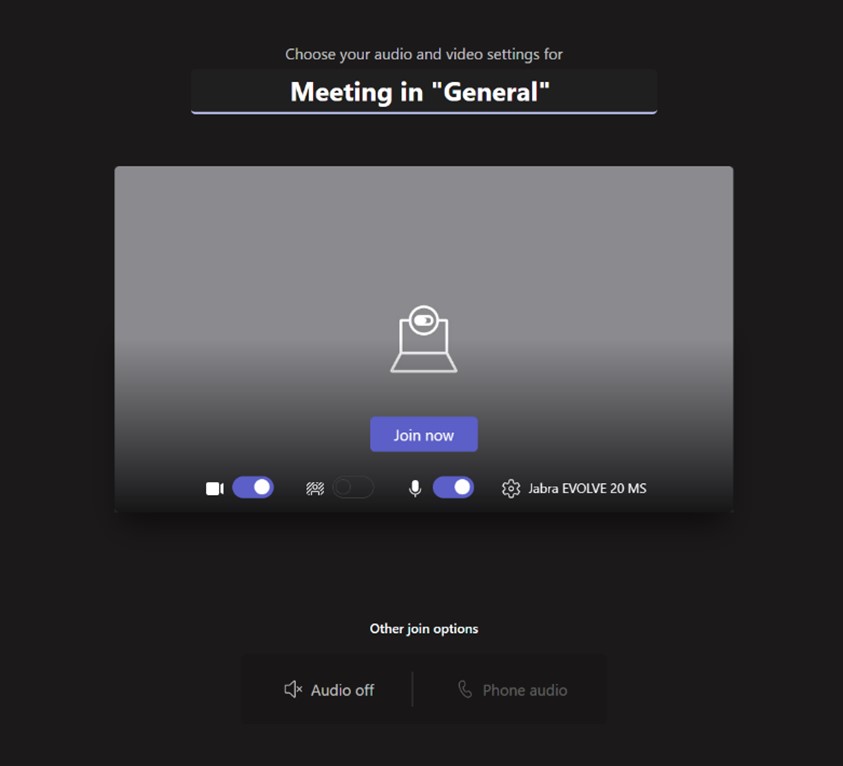
4. When the meeting window opens, you can enter a subject (optional), choose whether or not to show your video, and when you are ready, click Join Now.
5. Once you have clicked Join Now, you will see a Toolbar like the one below.

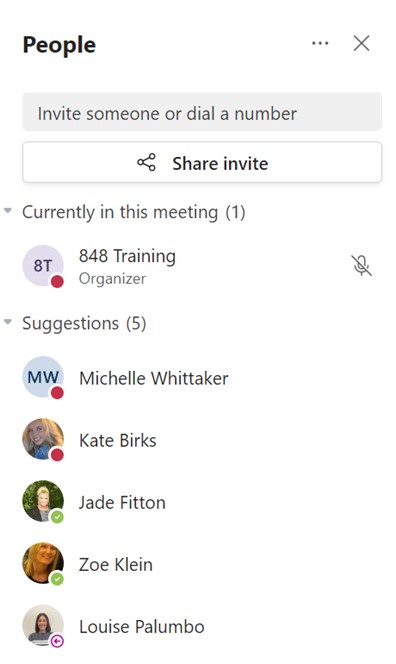
6. Click on the Show Participants button
7. You can either invite participants or dial a number for them to join, or you can share the invite via Teams or Outlook. This method is useful for inviting users who are not already a member of the team.
Joining an On-Demand Meeting
There are two ways to join an in-demand meeting. You can either be invited to the meeting or join via the channel if you are a member of the team the meeting was created within.
Joining via an invite – When the meeting invitation appears on screen, choose either Video or Voice only. You will now be added to the meeting.
Joining via the Channel – Locate the channel the meeting is taking place within and open it. Click on the Join button for the meeting. When the meeting window is displayed, choose your audio and video settings and click Join now.
Scheduling Meetings
The main benefit of a scheduled meeting is that it will be added to the calendar of anyone invited, but users can also join from within a team if the meeting is added to a channel too. Team meetings also provide an area for chat and an option to create a video recording of the meeting. You can also schedule a meeting from Outlook.
How to Schedule a New Meeting
A scheduled meeting can be created by any Microsoft Teams user and it’s easy. Below is a step by step guide to show you how.
- Select the Calendar option from the Navigation Bar.
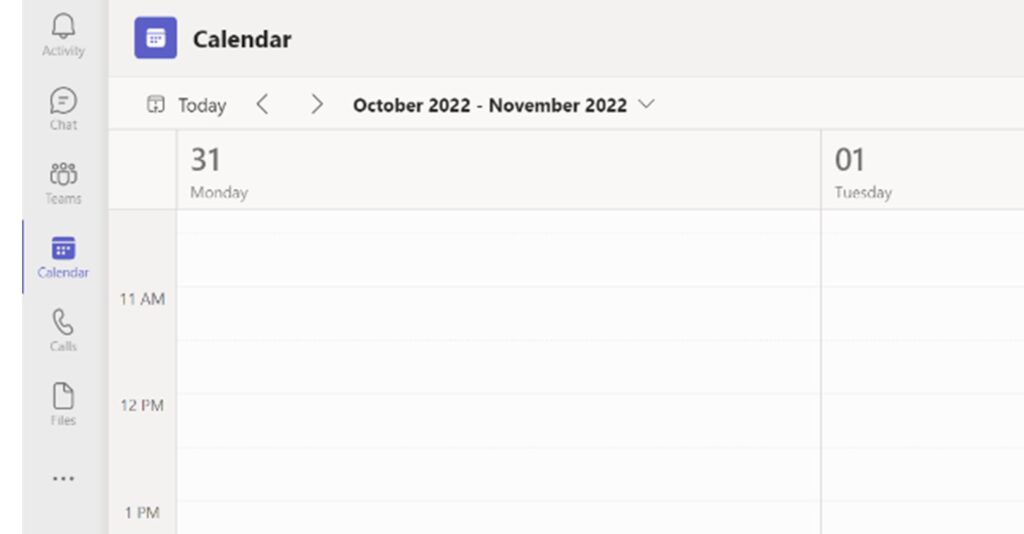
2. You can either navigate to the date and time on the calendar of when you want the meeting to take place and double click or click on the + New meeting button at the top-right to create a new meeting.
It’s important to complete as much detail as possible for the meeting so that your participants know what the meeting is about, how long it will last, where it is taking place etc… In the example below, the Optional option was used to give one recipient the choice to attend.
The Scheduling Assistant was used to quickly find the most suitable meeting date and time for all attendees.
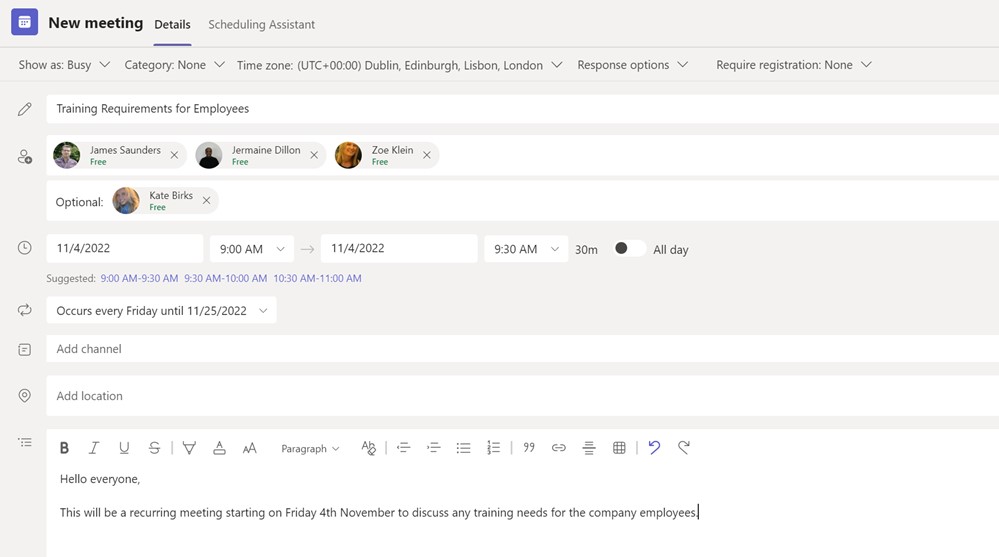
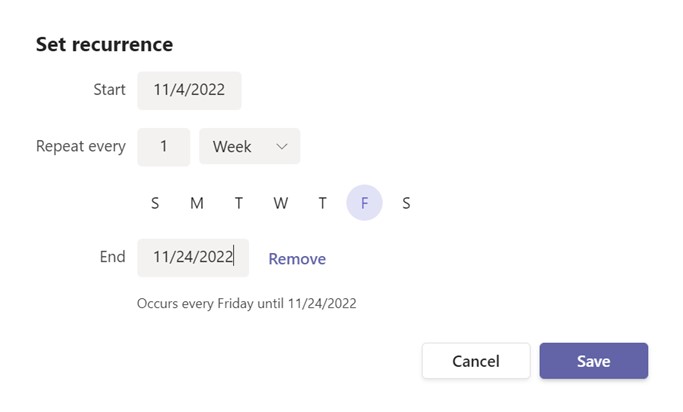
The Series feature gives you the option to set up a recurring meeting that will appear in all participants calendars.
A description can also be added to allow the recipients to view what the meeting entails.
Once you have completed all the details required, select Send. This meeting will now be added to your calendar within Teams. Recipients will receive an invitation via email to accept and add to their calendar, or decline. Either way, you will be able to see on the meeting you have organised, who has accepted, not responded, or declined.
How to Join and Utilise the Tools in a Teams Meeting
If you were invited to a scheduled meeting, then you can join from the Calendar within Microsoft Teams.
Select the Calendar option from the Navigation Bar and click on the meeting to open it. Select the Join button at the top of the meeting event and choose which inputs, audio and video you wish to turn on. When you are ready to join the meeting, click Join now.

Using the Meeting Controls Tool Bar
There is a range of different controls that are available during meetings. You can toggle your audio and video camera off and on, share your screen with others, chat with and view participants, record a meeting, leave the meeting and, if you’re the organiser, end the meeting. All of these controls can be accessed from the main meeting control bar.
Toggle Your Audio and Video On and Off
During a meeting, there may be times when you want to turn your webcam or microphone on and off quickly.
This can be accomplished using the Camera and Mute buttons. When inactive, the button will be displayed with a line through it.

Meeting Conversations
The Conversation option opens a meeting chat pane on the right side of the screen during a meeting. The Chat is not private as it can be viewed by everyone involved in the meeting. This option is often used to share files and websites. A full history of the chat will be available to view in a group chat between the meeting participants.
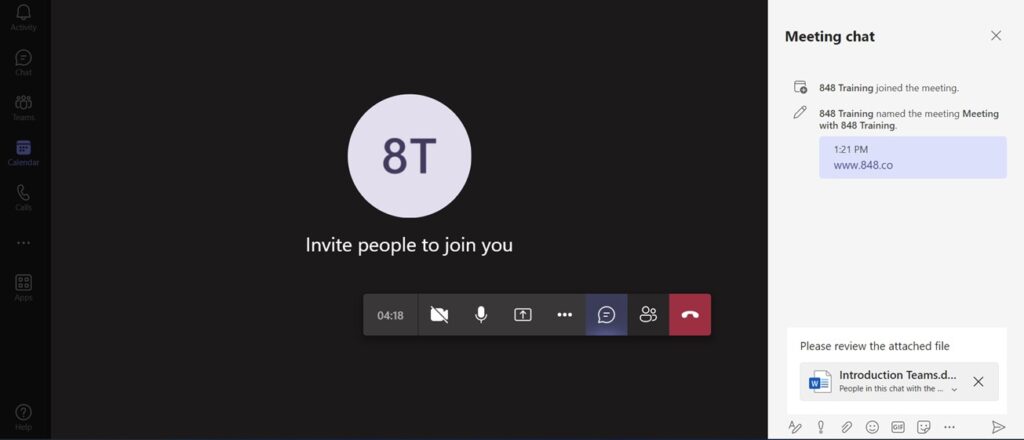
Show Participants
The Show Participants option opens the People panel on the right of the screen so you can view who is currently in the meeting. From here you can also invite someone, dial a number or share the invite via email or other social media platforms.
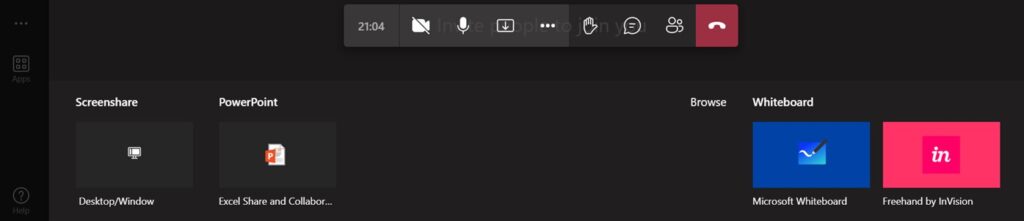
How to Share Your Screen and Presentations
During a meeting you can share your desktop, an open application, a PowerPoint presentation, or a whiteboard with other participants. The Screenshare option allows you to share your entire screen.
Sharing your screen with others
Click on the Share button from the meeting control toolbar and click on Desktop/Window.
When the Share your screen window opens, choose what you would like to share and click Share.
To end the screen share, click the Stop Sharing button option.
Recording a Meeting
A recording of a meeting can be initiated by any participant once it has started. The recording will be posted in a new chat between all the participants. Always notify all the meeting’s participants that you will be recording the meeting and that any audio, video or screen sharing will be captured as part of the recording.
How to Record a Meeting
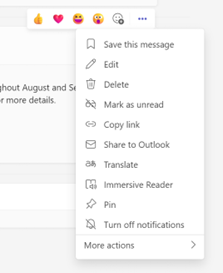
Notify all participants that you are about to start recording the meeting. Click on the More options button (…) and choose Start recording.
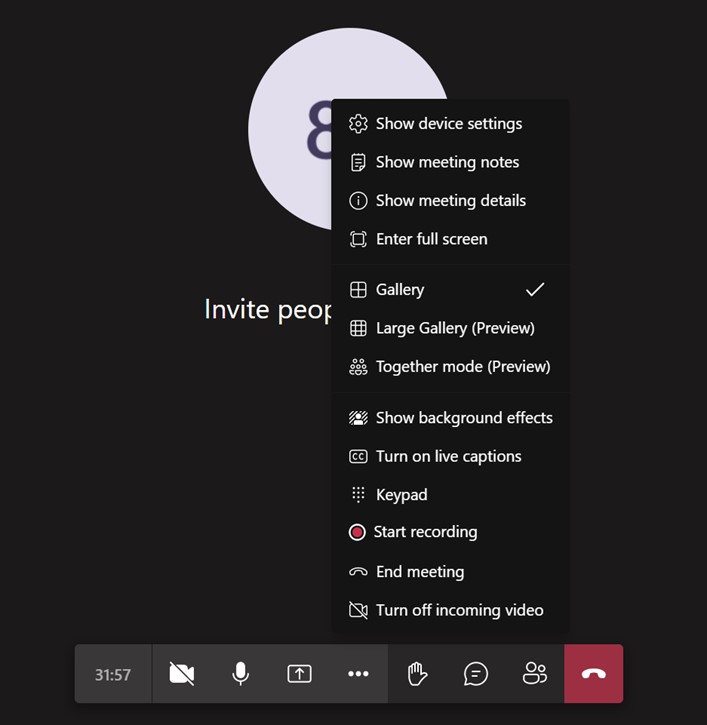
Here you will see confirmation that the recording has started via a small recording symbol next to the meeting duration counter.
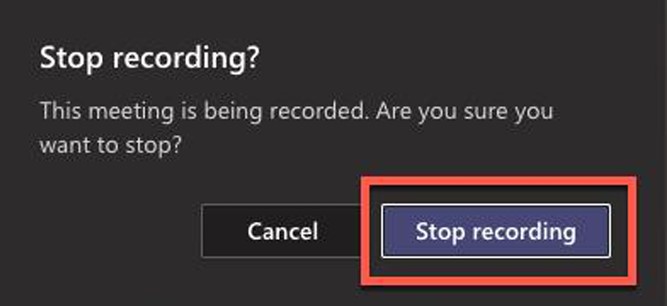
To end the recording, choose More options and Stop recording. When asked to confirm, click on the Stop recording button.
After the meeting has been recorded you can view and download from the chat created for the meeting.
Leaving and Ending a Meeting
There are two main ways in which you can leave a Teams meeting. You can either leave the meeting yourself at a time convenient to you, or the meeting can be ended for everyone, but only by its organiser.
How to Leave a Meeting as a Participant
You can leave the meeting using the Hang up option. You won’t be asked to confirm that you wish to leave so if you click this accidentally then you will leave the meeting and will need to re-join.
How to End a Meeting for all Participants as the Organiser
As the meeting’s organiser you have an extra option to end the meeting for everyone. This is a useful way of closing the meeting room so that no participants remain afterwards. Click on the More options button and choose End meeting from the menu. When the ‘End the meeting?’ Dialog box appears, click End. The meeting will now end for everyone.
Teams in the Navigation Bar
In Microsoft Teams, you have an area where a group of users can work collaboratively, share ideas and information, and create meetings in a safe and secure space. Conversations, files, and notes created and shared within team channels are only visible to members and owners of the team they were shared within.
How to Join an Existing Team
There are a few different ways to join a team including being added by the team owner, searching for a team, following a request link or you can access a team using an access code. The most common way to be added to a team is by the team owner.
Entering a Team Via an Owner Invitation
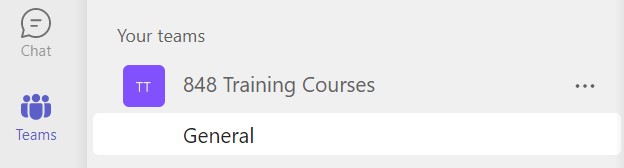
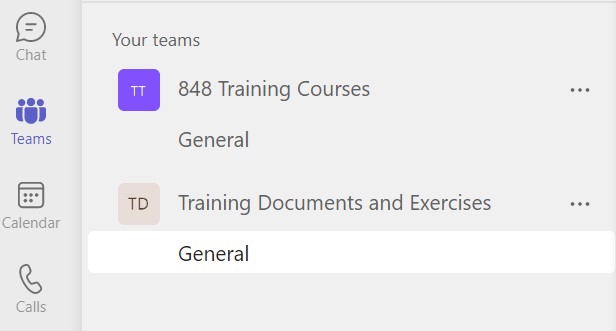
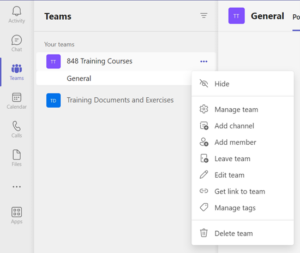
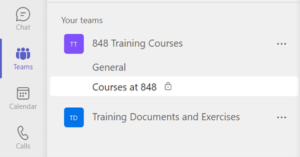
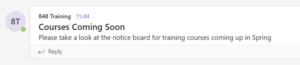
Any Teams you have been added to, will be visible in the Teams menu on the left-hand side of the screen. There is no requirement for you to request access or await approval to access the team or its content although you will receive a message via email confirming you have been added. In this image, you will see the team 848 Training Courses and a given channel named General as default.
How to Search for a Team
Click on Teams in the Navigation Bar to open the Teams area.
Click on the Join or create team button at the bottom left of the screen.
Enter the team name or key word in the Search teams box and click the search icon. Any teams matching the name or key word will now appear.
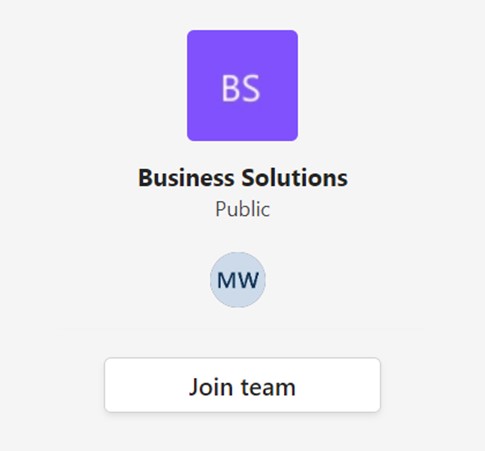
You can join a team by clicking on the Join team button which will become visible when you hover the mouse arrow over the team.
How to Join a Team Via a Link
If you haven’t been added to a team by the owner, you may be sent a link to join an existing team. If the team’s privacy level is Public, when you click on the link you will be able to join and view the team immediately. If the team is Private, you must wait until the team owner accepts your request.
How to Join a Team Using a Code
The final way of joining a team is to enter a code issued by the team owner. The benefit of this option is that because the code can only be issued by the team owner, you don’t need to await approval to access the team.
How to Join an Existing Team Using a Code
Copy the access code you were sent by the team owner.
From the Teams area click on the Join or create team button. Within the Join a team with a code box, paste the code into the entry box and click the Join team button.
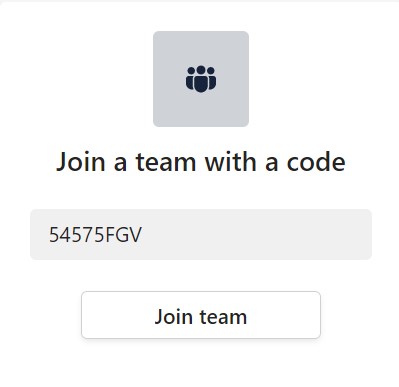
Click on Teams on the Navigation Bar to check that the team appears in the list.
Creating a New Team
Any user of Microsoft Teams can create their own team and add members to it. You can create as many teams as you like and there are no restrictions on the number of team members you can add. When creating a new team, you automatically become the owner.
How to Create a New Team
Click on Teams from the Navigation Bar.
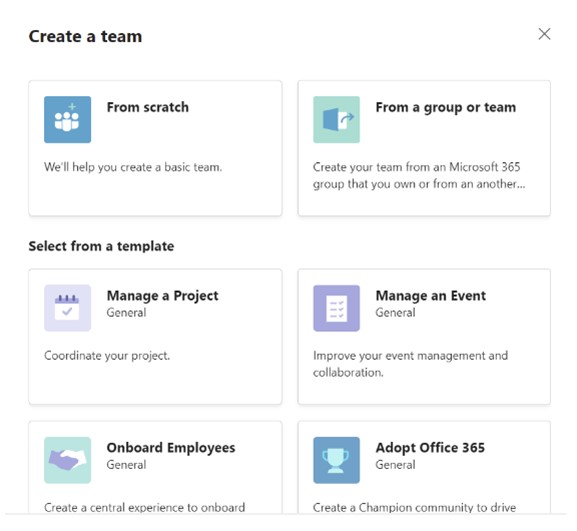
Click on Join or create team button at the bottom left corner of the screen. Click on the Create team button within the Create a team box.

Click on the type of team you’d like to create. This could be from scratch, from a group or Team or you could use one of the existing Templates.
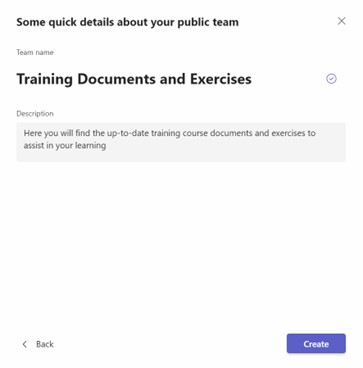
In this example, the team created is from scratch. You will be asked ‘What kind of team will this be?’
Select from options Private or Public.
Give your new team a name and description.
Click the Create button.
In the next step you will be asked to add members to your team. However, you do have the option to skip and add members later.
To view the Team you’ve just created, click on Teams in the navigation bar and your Team should appear there.
How to Invite Members to a Public Team
To add members to a public team, select Teams from the Navigation Bar and click the three dots to the right of the team.
This will allow you to choose from the menu Add Member.

Start typing a name, distribution list, or security group to add to your team. You can also add people outside your company as guests by typing their email addresses.
Click Add. The members you add will receive an email to let them know they are now a member of the team. When they click Teams on the Navigation Bar, the new team will become visible.
Inviting Members to a Private Team
If you have created a private team, then users will not be able to join unless you add or invite them. As the team owner, it’s likely you will add users as members, however, you can also invite them so that they can choose whether or not to join your team. This can be done via a direct link to your team or a code.
How to Invite Users to Your Private Team Via a Direct Link
Click on the Teams button to display your teams.
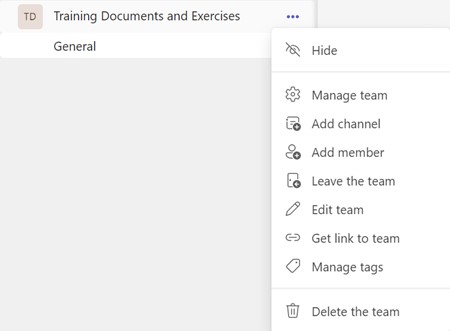
Click the three dots to the right of the team you wish to invite users to.
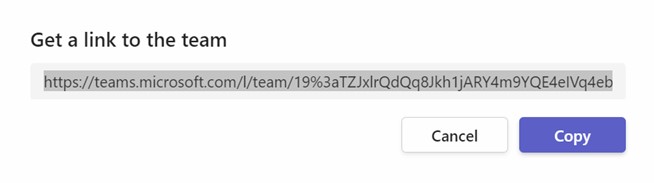
Select from the menu ‘Get link to team’, and when the link appears, click Copy. You can now paste and share the link with your users.
Any of the team members can share this link but only the team owner can approve a request to join. The owner will receive a notification and email when a user requests to join their team.
Pending requests can be viewed, accepted, or declined by the team owner via More options (…), Manage team, and Pending Requests.
How to Invite Users to Your Private Team Via a Code
Click More options for the team you want to generate a code for and choose Manage team.
Open the Settings menu and click Team code to expand the group and display the joining code.
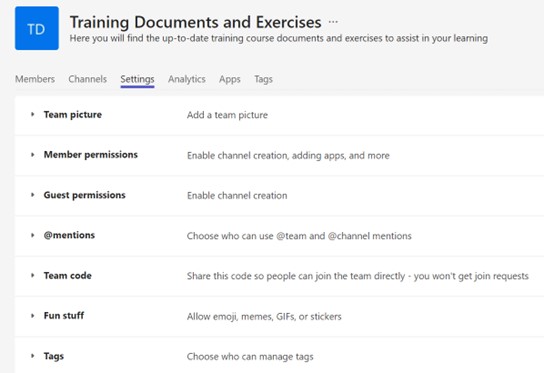
Select the Generate button and a code will appear on the screen.
Once copied, you can share the code with any users you wish to invite to your team. They will not need to request approval to access the team and will be able to view content immediately after joining with the code.
Managing Teams and Team Settings
When you are a team owner you have access to certain controls that invited team members do not. As a team owner, you can add and remove users from your team, manage existing user permissions, manage pending requests, and modify the general team settings. Each team can have more than one team owner.
To access the owner controls, select More options and Manage team.
Adding and Removing Members
How to Add a User to Your Team
Select Manage Team from the More options menu. Open the Members tab.
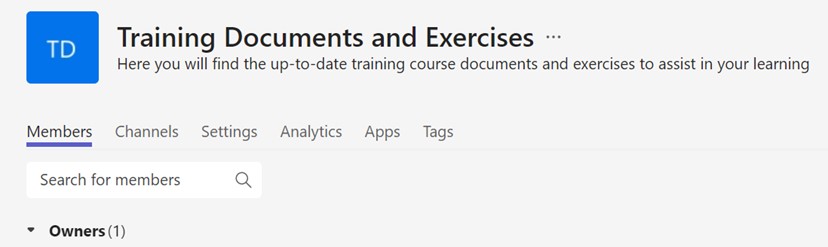
When the ‘Add members’ box appears, search for and select your user, and click Add. Choose whether to make the user a Member or Owner and click Close.
How to Remove a User From Your Team
Existing users can be removed from a team by simply clicking on the ‘X’ next to the users name within the Members tab. Be aware, you are not asked to confirm before removing the user.
Hiding, Leaving, or Deleting a Team
A team member can hide or leave any team that they are part of but only team owners can delete a team. Also, after using Teams for quite some time you may begin to find that the Teams area becomes a bit full with all of the teams you are a member of. To help make it more manageable, you can hide any teams which you wish to remain part of but do not need to see within the Teams area.
How to Hide a Team
Click on Teams from the Navigation bar and select More options next to the team you wish to hide.
Click Hide.
The hidden team will now be moved to the Hidden teams group within the Teams pane.
How to Unhide a Team
Click on Teams from the Navigation bar and select More options next to the team you wish to unhide.
Click Show.
How to Leave a Team
Click on Teams from the Navigation bar and select More options next to the team you wish to leave.
Click Leave the team.
The Leave team dialog box will appear. Click on the Leave the team button. The team will be completely removed from the Teams area, and you will no longer have access to it. You can re-join later providing the team still exists.
How to Delete a Team
A team can be deleted by any of its owners. Always be sure you want to delete the team and all its contents before deleting.
Click on Teams from the Navigation bar and select More options next to the team you wish to delete.
Click Delete the team.
When the Delete team dialog box appears, confirm that you understand everything will be deleted.
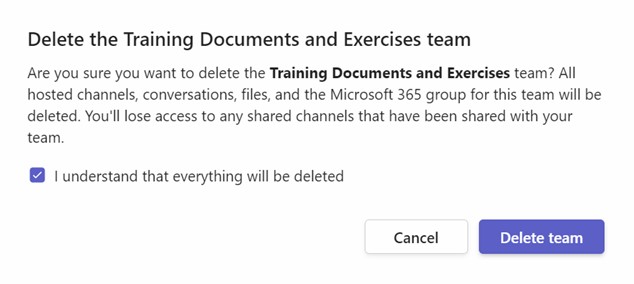
Click on the Delete team button.
The team will now be removed from the Teams area for all members. The team owner can restore a deleted team within thirty days of it being deleted. After this time, the team will be permanently deleted.
Working with Channels
Channels within a team are given sections to keep conversations organised. For example, if you are using a team for a specific project, then a new channel could be created for that subject. Channels will appear underneath the team name in the Teams area. Every newly created team starts out with a ‘General’ channel.
How to Create, Manage, Secure, and Delete Channels
Creating a Channel
Microsoft Teams allows you to create a total of 100 channels. A new channel can be created by any user within the team, either as a member or an owner.
Creating a New Channel
From the Teams area, open the team you wish to create the new channel within.
Click on more options and choose Add channel.
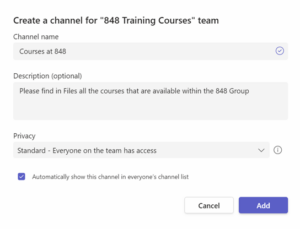
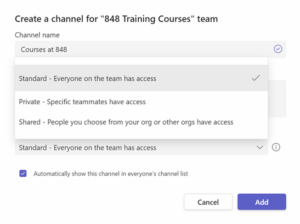
As shown below, the privacy option allows you to make your new channel either accessible to everyone (Standard) or only specific people within the team (Private). You may also wish to tick the checkbox so that everyone within the team can see the channel. When you’re ready to create the channel, click Add.
Managing Existing Channels
Existing channels can only be managed by team owners; however, they can be deleted by both team owners and members. Private channels work slightly differently as they are owned by the user who created them or any user added to the channel as an owner, so can only be managed and deleted by those users.
Managing a Standard Existing Channel
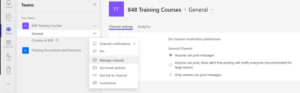
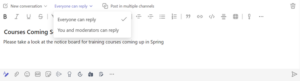
As a team owner, click on the ‘More options’ option for the channel you wish to manage and choose Manage channel. Use the options under Channel settings to moderate posts/comments within the channel and choose which users can add new posts.
Managing a Private Channel
As a user who created the private channel, click on the More options option for the channel you wish to manage and choose Manage channel.
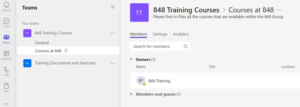
Click through the various tabs below the channel title to manage channel members, edit general channel settings and view channel analytics.
How to Delete a Channel
Click on More options for the channel you wish to manage and choose Delete channel.
When the Delete channel from team dialog box appears, click Delete to delete the channel and all of its conversations. Although you are deleting the channel you can still access any files created or shared within it via SharePoint using the link in the dialog box.

Channel Conversations
How to Start, Reply, Edit, and Delete Conversations and Messages
One of the main things that you will likely do in Microsoft Teams is engage with other team members. Conversations within a channel are essentially threads which team members can reply to.
Starting a New Conversation
Any member of a team can start a conversation within a team’s channel.
From the Teams area, click on the channel you wish to start a conversation within. At the bottom of the screen, click the New conversation button.
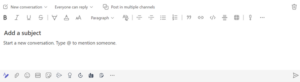
Click on the Format option below the Start a new conversation box.
Opening the formatting options allows you to enter a subject for your conversation as well as access formatting tools. Adding a subject makes it easier for users to identify threads. Enter your conversation’s subject in the Add a subject box and type your message in the box below it. You can select your message text and apply formatting using the formatting options above the subject box.


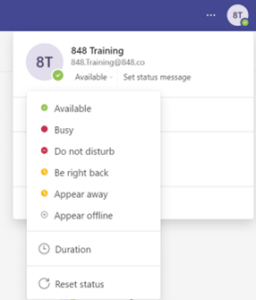
As well as changing your status, you can also create a status message for other users to see. This is useful if for example you are away but only for a few minutes.
How to Set a Status Message
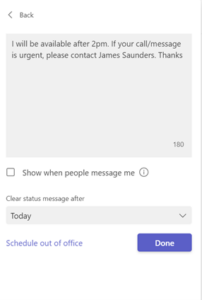
Open the user profile options and choose Set status message.
Type your message into the box and choose whether or not to automatically show the message to users who try to message you. Select how long you want the message to be displayed for and click Done. Your message will now be displayed and can be edited or deleted anytime.
Scheduling Out of Office
Set up a message to let others know you are on holiday or not available to reply. Your Out of Office status will also sync with your Outlook calendar.
Open the user profile options and choose Schedule out of office.

Type your out of office message and select Turn on Automatic replies. Tick the boxes for Send replies outside my organisation and Send replies only during a time period if required. Click Save.
Changing your General Settings
When it comes to settings in Teams, they are very straight forward. To access the Settings menu, click on the Settings and more (…) option next to your user profile and choose Settings. The General settings group allows you to change your theme, layout, language, Out of Office and more.
What Do Your Settings Mean?
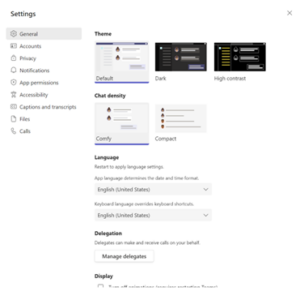
General
The General section includes settings for the theme you are using, how the application behaves, and the language you want to use. You can change the way Teams looks by changing the theme you are using. For example, maybe you prefer a dark or high-contrast theme to the default.
In the application section, you can decide how you want Teams to behave on your computer. For example, do you want Teams to start up automatically when you boot up your computer? Or do you want Teams to stay running in the background when you click the Close button on the Teams app?
You can delegate your calls to other colleagues on your behalf, change the language format and keyboard layout you are using and Schedule Out of Office and Set Automatic Replies.
Accounts
This section will allow you to view your account/s, but you also have the ability to change the password, personalise your account settings and set how your data is used, see all organisations you are part of and more.
Privacy
In the Privacy section, you will find settings to manage priority access, turn on or off read receipts, and turn on or off surveys.
Priority access defines who you will allow to interrupt you when your status is set to Do Not Disturb. For example, you might want your line manager to be able to send you messages at any time, but everyone else must wait until you set your status to Available.
Read receipts are used to inform others when you read their messages. If you don’t want people to know that you have read a message, then you can turn this off.
The surveys option is a tool Microsoft uses to improve Teams. If you don’t mind giving feedback, you can leave this option on. If you don’t want to be bothered with it, then turn it off and Microsoft won’t survey you for your opinion on how to improve Teams.
You can block contacts, so they are unable to call you or see your presence.
Notifications
The Notifications area is where you edit your preferences for how Teams should notify you about chats, meetings and calls. You can set Appearance and Sound, show message preview and change the activity notifications for Teams and Channels.
Devices
You can configure the devices you are using with Teams in this settings section. A device includes items like your speaker, microphone, phone, headset, or camera. Options available are automatically adjusting mic sensitivity, noise suppression and camera controls.
App permissions
Control what your apps can access when using Teams. Some apps have permissions enabled by default for your convenience.
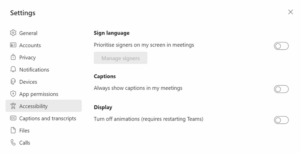
Accessibility
Captions and Transcripts
Live captions can be turned on by all team meeting participants and will present real-time captions to those who have turned it on.
Transcriptions can only be enabled by those who can record, this will create a live transcription feed that can be viewed by all participants during the meeting and the transcription file will also be available to view after the meeting has finished.
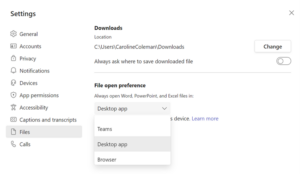
Files
Calls
Teams can replace your regular telephone. In this section, you can configure how incoming calls are answered as well as setting up and configuring your voicemail and ringtones. You can also set accessibility options such as using a teletypewriter (TTY) device for people who are deaf or hearing impaired.
Access face-to-face or virtual Microsoft 365 training for your teams
This guide to Microsoft Teams offers great tips and “how-to” guidance for a range of features across the platform. But you may prefer more in-depth training and guidance to help you get more out of Teams.
As an experienced Microsoft Solutions Partner, we offer a range of end-user training courses designed to meet varying skill levels. All of our training courses, introductory to advanced, are delivered by our Microsoft training specialist and can be tailored to meet your business requirements.
You can find out more information about our end-user courses here, or get in touch on [email protected].